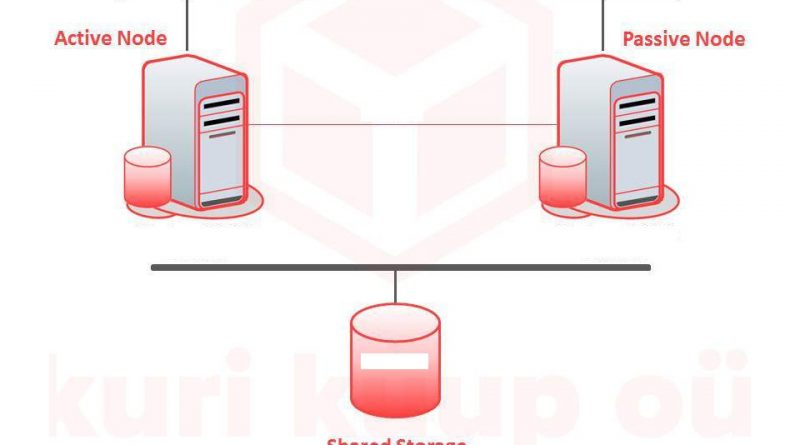
How to configure Oracle DB cluster
Oracle Database (commonly referred to as Oracle RDBMS or simply as Oracle) is an object-relational database management system produced and marketed by Oracle Corporation.
This tutorial explains the detailed steps to configure cluster for oracle dba using corosync and pacemaker.
Please note that, we are using the following server details in this article.
192.168.10.1 – node01 – first cluster node – running CentOS 6.4
192.168.10.2 – node02 – second cluster node – running CentOS 6.4
192.168.10.20 – floating ipaddress
Step1: Disable iptables
# service iptables stop
# chkconfig iptables off
Step2: Disable selinux
#vi /etc/sysconfig/selinux
Update line as below and save the file. Server required a reboot as this stage
SELINUX = disabled
Step3: Configure the hosts files with the hostnames of both the servers
192.168.10.1 node01.localhost.com node01
192.168.10.2 node02.localhost.com node02
Steps4: Install cman and pacemaker
#yum -y cman pacemaker pacemaker-cli fence-agents resource-agents openais
Step5: Open the cluster configuration file "/etc/cluster/cluster.conf" and the update the below lines.
<?xml version="1.0"?>
<cluster config_version="1" name="pacemaker">
<cman two_node="1" expected_votes="1"/>
<fence_daemon clean_start="0" post_fail_delay="0" post_join_delay="3"/>
<clusternodes>
<clusternode name="fileserver-1" nodeid="1" votes="1">
<fence>
<method name="pcmk-redirect">
<device name="pcmk" port="node01"/>
</method>
</fence>
</clusternode>
<clusternode name="fileserver-2" nodeid="2" votes="1">
<fence>
<method name="pcmk-redirect">
<device name="pcmk" port="node02"/>
</method>
</fence>
</clusternode>
</clusternodes>
<fencedevices>
<fencedevice name="pcmk" agent="fence_pcmk"/>
</fencedevices>
</cluster>
Step6: Open the corosync configuration file "/etc/corosync/corosync.conf" and update the below lines.
compatibility: whitetank
totem {
version: 2
secauth: on
interface {
member {
memberaddr: 192.168.10.1
}
member {
memberaddr: 192.168.10.2
}
ringnumber: 0
bindnetaddr: 100.100.10.0
mcastport: 5405
ttl: 1
}
transport: udpu
}
logging {
fileline: off
to_logfile: yes
to_syslog: yes
debug: on
logfile: /var/log/cluster/corosync.log
debug: off
timestamp: on
logger_subsys {
subsys: AMF
debug: off
}
}
Step7: Create service definition for pacemaker resource manager
#vi /etc/corosync/service.d/pcmk
add the below line and save the file.
# Load the Pacemaker Cluster Resource Manager
name: pacemaker
ver: 1
Step8: Create key to encrypt the communicatoins.
On the first node,
#corosync-keygen
This command will sit waiting for entropy to be generated. A quick way of doing this is to ssh in to the node via another session and run,
#find / >/dev/null 2>&1
a few times. Once the key is generated, it’ll be available at /etc/corosync/authkey.
Step9: Copy key to other server
Copy it to the other cluster node, and secure it:
#cp /etc/corosync/authkey root@node02:/etc/corosync
#chmod 400 /etc/corosync/authkey
Step10: Start pacemaker and corosync services
#service pacemaker start
#service corosync start
The cman service will not start if NetworkManager is either running or has been configured to run with the chkconfig command.
Step11: Install CRM shell
#cd /etc/yum.repos.d/
#wget http://download.opensuse.org/repositories/network:/ha-clustering:/Stable/CentOS_CentOS-6/network:ha-clustering:Stable.repo
#yum -y install crmsh graphviz
Step12: Disable STONITH
#crm configure
property stonith-enabled="false"
commit
exit
Step13: Configure crm properties
#crm configure show
node node01.localhost.com \
attributes standby=off
node node02.localhost.com \
attributes standby=on
primitive OraLSN oralsnr \
params sid=MSCCCDB home="/home/oracle/Oracle/product/12.1.0/" user=oracle listener=MSCCCDB \
op start interval=0s timeout=60s \
op stop interval=0s timeout=60s \
op monitor interval=30 timeout=60 depth=0 \
meta target-role=Started
primitive OraSrv oracle \
params sid=MSCCCDB home="/home/oracle/Oracle/product/12.1.0" user=oracle shutdown_method=immediate \
op start interval=0s timeout=120 \
op stop interval=0s timeout=120 \
op monitor interval=120s timeout=60s
primitive failover_ip IPaddr2 \
params ip=192.168.10.20 cidr_netmask=32 \
op monitor interval=30s
primitive fs_ora_archive Filesystem \
params run_fsck=no device="/dev/sde1" directory="/Ora_Archive" fstype=ext4 \
op start interval=0s timeout=60s \
op monitor interval=15 timeout=40s \
op stop interval=0 timeout=60s on-fail=ignore
primitive fs_ora_backup Filesystem \
params run_fsck=no device="/dev/sdc1" directory="/Ora_Backup" fstype=ext4 \
op start interval=0s timeout=60s \
op monitor interval=15 timeout=40s \
op stop interval=0 timeout=60s on-fail=ignore
primitive fs_ora_data Filesystem \
params run_fsck=no device="/dev/sdd1" directory="/Ora_Data" fstype=ext4 \
op start interval=0s timeout=60s \
op monitor interval=15 timeout=40s \
op stop interval=0 timeout=60s on-fail=ignore
primitive fs_ora_index Filesystem \
params run_fsck=no device="/dev/sdg1" directory="/Ora_Index" fstype=ext4 \
op start interval=0s timeout=60s \
op monitor interval=15 timeout=40s \
op stop interval=0 timeout=60s on-fail=ignore
primitive fs_ora_soft Filesystem \
params run_fsck=no device="/dev/sdf1" directory="/Ora_Soft" fstype=ext4 \
op start interval=0s timeout=60s \
op monitor interval=15 timeout=40s \
op stop interval=0 timeout=60s on-fail=ignore
order OraLSN-after-FS inf: failover_ip OraLSN
colocation OraLSN-with-FS inf: failover_ip OraLSN
colocation OraLSN-with-OraSrv inf: OraLSN OraSrv
order OraSrv-after-OraLSN inf: OraLSN OraSrv
order fs_ora_archive_before_ip Mandatory: fs_ora_archive failover_ip
order fs_ora_data_after_ip Mandatory: fs_ora_data fs_ora_archive fs_ora_backup fs_ora_index fs_ora_soft failover_ip
colocation fs_ora_data_colo inf: failover_ip fs_ora_data fs_ora_archive fs_ora_backup fs_ora_index fs_ora_soft
property cib-bootstrap-options: \
have-watchdog=false \
dc-version=1.1.14-8.el6_8.2-70404b0 \
cluster-infrastructure=cman \
expected-quorum-votes=2 \
stonith-enabled=false \
no-quorum-policy=ignore \
last-lrm-refresh=1479892683
Step14: Check the crm status
[root@node01 ~]# crm status
Last updated: Thu Nov 24 12:29:33 2016 Last change: Thu Nov 24 12:29:27 2016 by root via crm_attribute on node02.localhost.com
Stack: cman
Current DC: node02.localhost.com (version 1.1.14-8.el6_8.2-70404b0) - partition with quorum
2 nodes and 8 resources configured
Online: [ node01.localhost.com node02.localhost.com ]
Full list of resources:
failover_ip (ocf::heartbeat:IPaddr2): Started node01.localhost.com
fs_ora_data (ocf::heartbeat:Filesystem): Started node01.localhost.com
fs_ora_archive (ocf::heartbeat:Filesystem): Started node01.localhost.com
fs_ora_backup (ocf::heartbeat:Filesystem): Started node01.localhost.com
fs_ora_index (ocf::heartbeat:Filesystem): Started node01.localhost.com
fs_ora_soft (ocf::heartbeat:Filesystem): Started node01.localhost.com
OraLSN (ocf::heartbeat:oralsnr): Started node01.localhost.com
OraSrv (ocf::heartbeat:oracle): Started node01.localhost.com
That's all......
